How to set Static IP for Ubuntu can be reviewed in this video 24:00
What is a static IP and why use static IP
Static IP means a device on the network preset its IP address to a fix one, and keep to use this configuration during time.
The configuration is done on the Device side, defines to the device itself to use the ip address for sending and reveiving data from the network switch/router. Since the settings is set in the device directly, it will not change according to the router or network switch even those device having hardware or software change during time. Thus this makes the device always available to be found on that location in the network. This is a very important feature for a server that serving the other device, since with static IP the other device like locks, gateways, encoders, phone apps will always be able to send and receive data from the server by the same address.
Besides Static IP address configured on the server side, most of the router will also able to assign a fix ip to a specify device within its network, by its DHCP service funtion. But it will require the DHCP server (router) always online, and setup will require to login into the router.
For the Hotel Lock system, we need to set Static IP address for the server, recommand to set manually.
This guide is written for our clients ordered the Mini-server, or clients also use Ubuntu-linux to run the server software of the HTlock System.
We will show how to log in , and use VIM to configure the network.
Preparation
This set up is done on Linux terminal, no GUI required.
To set this up, you need to access the (Mini) server by 2 different methods:
Option 1. Set on site with access to the hardware directly
Connect display and keyboard to the Mini server directly, Mouse not required in most case.
If your server has already install GUI, you need to login the desktop and then start up the terminal APP.
OPtion 2. Use SSH to set up remotely
This will require you to connect the server to router and then obtain the ip address from DHCP clint list.
By Default, our pre-loaded Mini server already enabled SSH server, just use the IP address to connect.
For Clients already ordered the Mini server, use the user name and password stick on the server to login the system.
Identify the network interface
We will list out the network interface, to get their ID which will be used in the next configuration step.
If you use the WiFi interface instead of the RJ45 port to link your server to the network, you canreview this guide to set WiFi connection.
Now in terminal input :
$ ip aNow the system should be listing out all the interface we have.
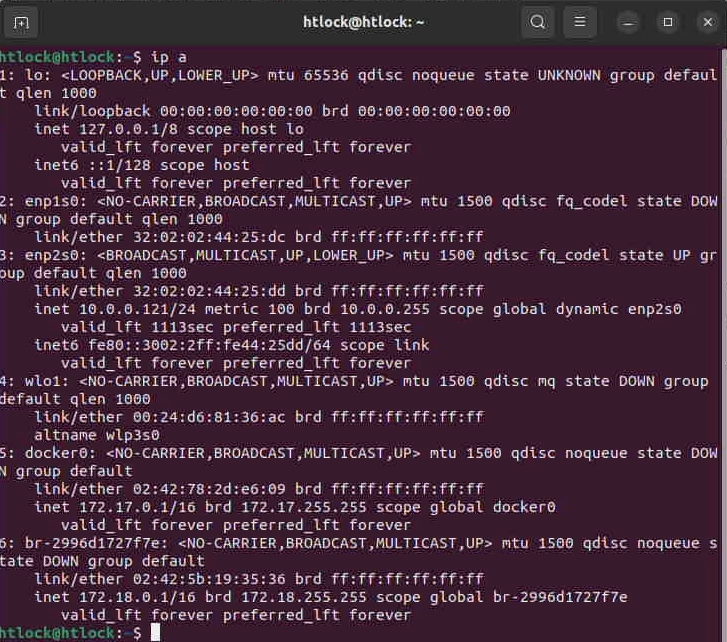
So we have all the interface listed. Next step we will pick the one that we need to use for connection. For example we will choose interface enp2s0, remember to change to the one you want.
Set Configure file
Now we will make an network configure file to define the static ip for the network interface:
sudo vi /etc/netplan/99_config.yaml
The system will ask for password , input your user password and click return.
Add new lines by type:
i
The vi text editor will switch to insert mode, input the settings according to your network requirement:
network:
  version: 2
  renderer: networkd
  ethernets:
    enp2s0:
      addresses:
        - 10.0.0.130/24
      routes:
        - to: default
          via: 10.0.0.1
      nameservers:
          search: [mydomain, otherdomain]
          addresses: [10.0.0.1, 1.1.1.1]
Remenber: replace the enp2s0 to your interface, and change IP according to your desired ip address, change the via ip to your gateway IP, name server(DNS) according to your name server request.
After all input, press esc on the keyboard.
Then press
:wq
plus enter. vi will save the file and exit.
Input comand
$ sudo netplan apply
System will read the configuration file and set to static ip address for interface enp2s0(or the one you had picked.)